Overview
Dashboard
The Dashboard allows you better insight into your business, including unique visitors, sales, and transactions.
On the light blue bar above the graph, you can select Daily to view today's transactions, Weekly, Monthly, Yearly, and all of your transactions using your Poynt device.
Within Sales, you can view all of your transaction types broken down by Payment Type, Items, Employees, Terminals, and Settlement batches.

Along the left-hand side, you'll see the ability to drill down to additional data reporting.
Transactions
Under Transactions, you can view all of your transactions. You also have the ability to filter your results by several variables on the left.
Settlements
Under Settlements, you can view all of the details about your open Batch. Additionally, you can select a terminal in the Individual Terminals column on the left to view and download a report of the last settled batch on that device.
Customers
Under Customers, you can view your sales by customer. You also have the ability to filter your results on the left.
Reports
Under Reports, you may generate a Transaction report to gather all of your transactions, an Items report to view all of the items you sold using your Catalog and Register app, or a Tax report to review the taxes you applied to orders and items in the Catalog and Register app. You may filter this data even further across specific employees and date ranges.
User Management
How to add Terminal & Web Users
There are two types of users you can create: Web and Terminal. Web users will have access to Poynt HQ only, and Terminal users will have access to the terminals only. If users need access to both web and terminal instances, they will have to be created under both categories.
- Create Web User : Click on the Invite Web User button. Enter in the name and email associated with that user. Once the invitation has been issued, they will show up on the list of users, with status set as Invited. The web user can now access Poynt HQ and view reports, add users, create and maintain catalogs and products. On their end, the user will receive an email with a link to enter in their password and complete the setup. Once the setup process has been completed, the status will change from Invited to Active.
Select “Invite web user”
Enter the user's first name, last name, email address and select “send invitation”
- Creating a Terminal user : Creating users here will grant them access to use the terminal. Click on add Terminal User and enter in their name and user name that will be associated with their account. You will also be able to designate their role on the terminal (Owner, Manager, Employee). Based on permissions assigned to each role, terminal users may be restricted in the tasks they can process on the terminal.
Enter the device user’s first name, last name select the role and create a login passcode
Once the user is created, you can view the list of terminal users, their permissions and user names. You can also manage terminal users from this screen (ie to update role, passcode or delete the user).
How to Change User Passcodes
Passcodes can be changed either on the device itself or through Poynt HQ web portal. Passcodes can only be reset by those who are permissioned to (typically Owners or Managers).
Review the permission settings on Poynt HQ web portal to see who has access to reset passcodes.
From Poynt HQ web portal
Step 1: Log into Poynt.net and click on 'Users' on the bottom left hand side of the navigation bar.
Step 2: Select 'Device users', and choose the device user you want to change the passcode. Under the Actions column, select the 'Edit user' to pull up the user's information.
Step 3: Enter a new passcode under 'Reset Passcode' and click on 'Save'.
Poynt HQ: Settings
In Poynt HQ you have the ability to view and manage business settings, store settings.
Store Settings
Store Settings allows you to update the store name (updates only in Poynt.net, not on the device), customize logo for email receipts, set tips, customize the screens on terminal, and establish other login and receipt settings.
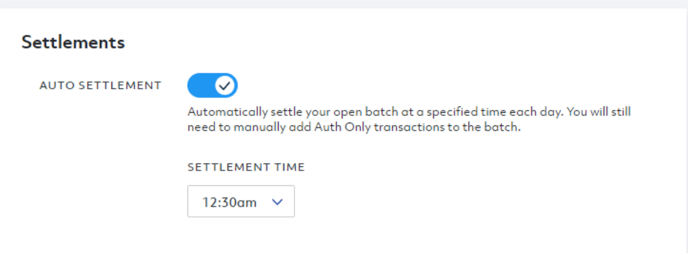
- Payments : Enable various methods of payment, tips and set settlement times.
PS: If you are not able to toggle the button, please contact our helpdesk at 1-888-900-9192 and a member of our team will be happy to assist.
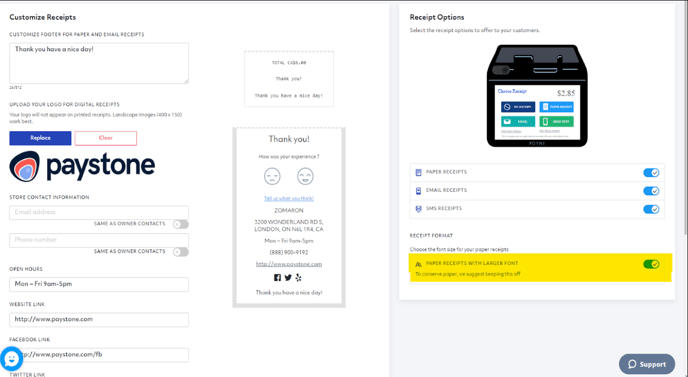
- Receipts : Customize your store's receipts with your business address and hours, social media handles. You may also toggle off any receipt type that you would like to hide during the customer checkout flow. You can also increase the font size and adjust the Receipt format.
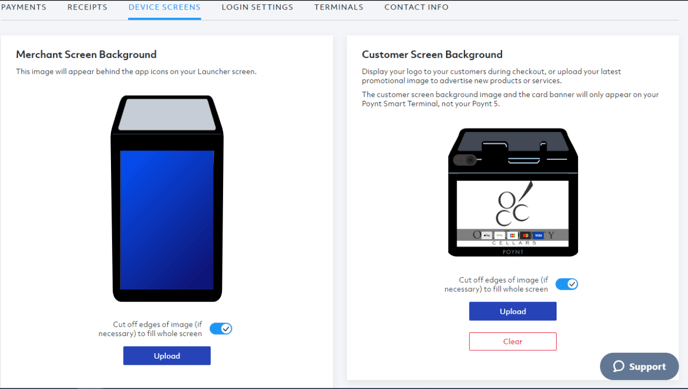
- Device Screens : Upload a custom image for both of the screens on the terminal. Enable logos of credit cards accepted by the store.
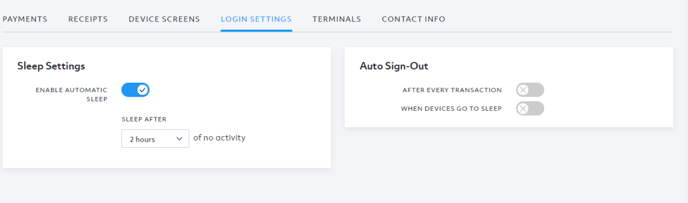
- Login Settings : Customize Sleep and Auto-Sign out Settings.
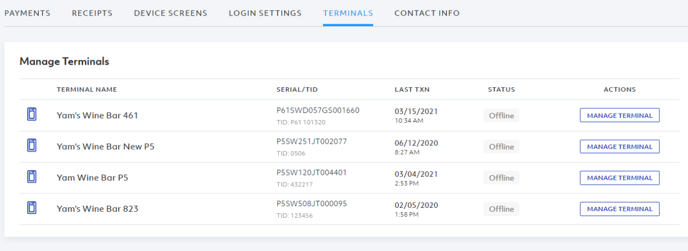
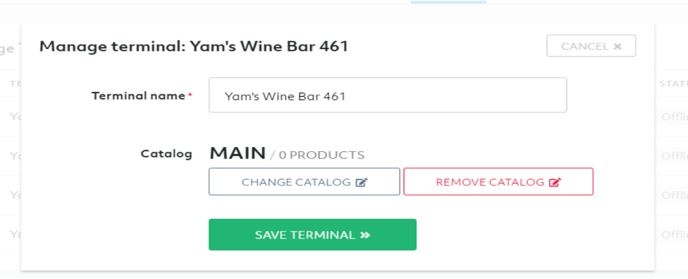
- Terminals : Allows you to change the name of the terminal, as well as change the catalog associated with it.
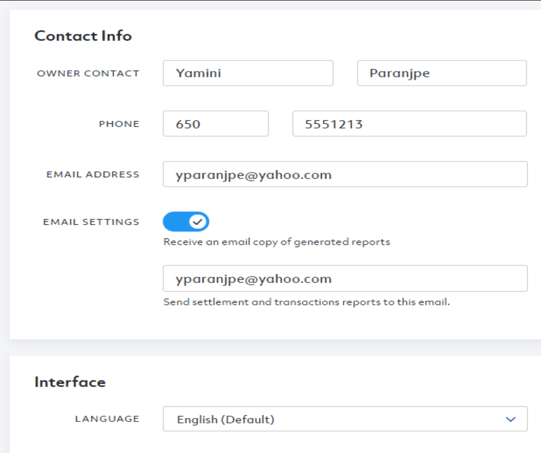
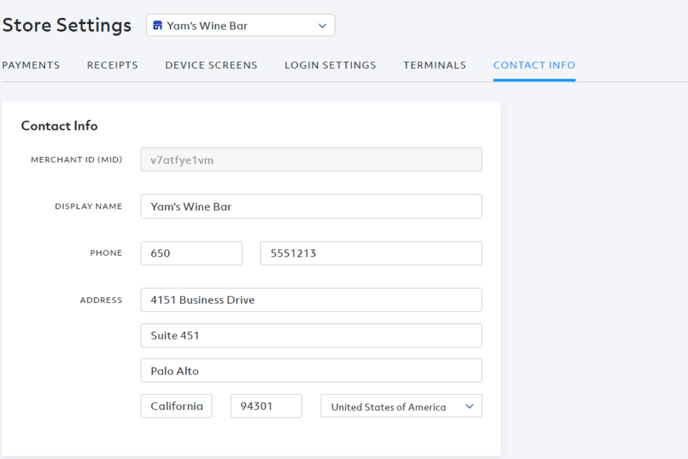
- Contact Info : Allows you to view and update your contact information accordingly.
- Merchant ID: A specific code assigned by your Reseller. Contact Paystone
- Display name: The store name and how the name will be displayed on the Poynt device.
- Phone & Address: Any changes on these fields will be reflected on the receipt.
Business settings
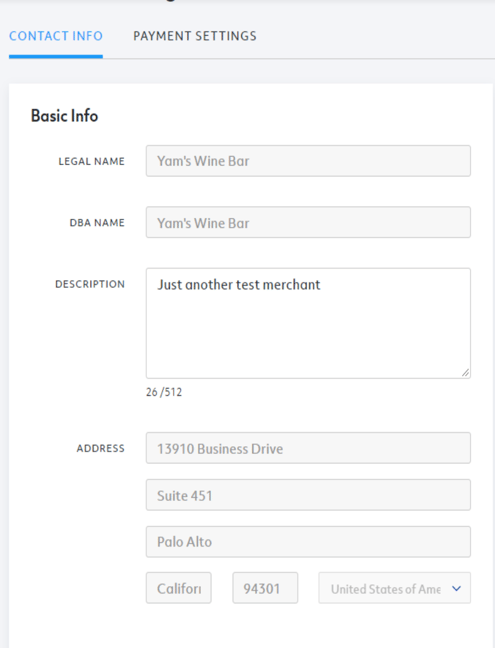
Business settings access to your Basic and contact information.
- Basic info : Allows to view information such as: Legal name, DBA name, description and address. In case you need to change this information, contact Paystone .
- Contact Info : Displays the business owner name and contact information such as phone and email address as well as to set language preference. You can also turn on notifications in order to receive emails about the status of your terminal.