The Move/5000 terminal can support the following three (3) network communications: Bluetooth, WIFI and Cellular 4G wireless. You can select any of these communication modes to use as your primary communication method. The following instructions will help you setup your device using one of the three (3) network communications:
For Bluetooth set-up
To connect via Bluetooth, a Bluetooth Communication Base is required.
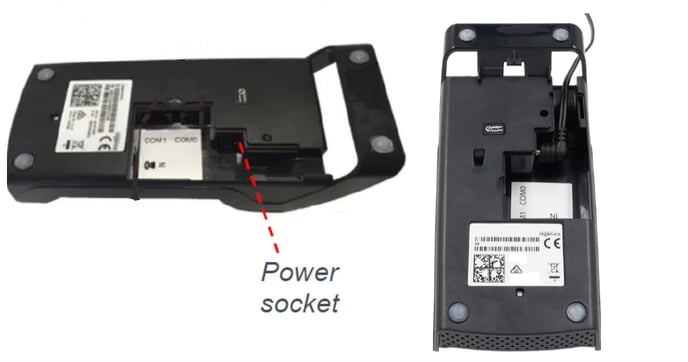
Plugging in the Device
- Connect the power cable to the inside of the base and reattach cover, Plug Power cable into source.

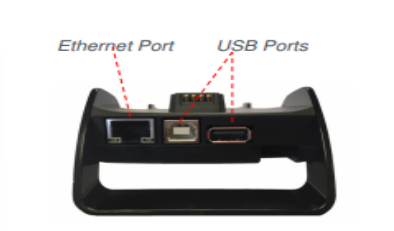
- Connect an ethernet cable to the Ethernet port located on the back of the base
Connecting your Device
- Place the Move5000 terminal on the communication base.
- Make sure the base is connected to BOTH the power and the internet.
- From the main screen, press # on the keypad, or select Admin Menu on the Move5000 touch screen.
- Select Setup Menu (If a password is required please contact Paystone support) > Communications > Bluetooth > New Base.
- Once the connection is successful, the message "Base Association OK" will appear.
- Terminal will now display the connectivity indicator which will be green, If not green please contact Paystone support.

Completing a test transaction
- Press 0, “Sale” or touch sale on the screen.
- Enter $0.01, Press Enter.
- Enter 1 if prompted for Invoice# or Server ID.
- Insert or Tap Card.
- Terminal should display “Approved” If not please contact Paystone support.
If needed you can void the above test transaction by following the below steps
- Press 3, “Void”.
- If a password is required please contact Paystone support
- Select All, Find transaction from above.
- Select sale, Insert card to perform void sale.
You are ready to accept payments!
For WIFI set-up
To connect via WIFI, a strong WIFI connection is required. (No base is required)
Plugging in the Device
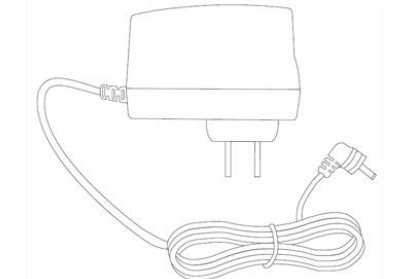
- Locate the direct-to-terminal charge cable.
- Locate the power port on the left side of the terminal (marked with the power symbol (
 ) and Insert the direct-to-terminal cable connector into the port).
- Plug the other end of the cable into a working power outlet.
- Press the Green key to power ON the terminal, proceed to the next steps below.
Connecting your Move5000 to Wi-Fi
- From the main screen press # on the keypad, or select Admin Menu on the Move5000 touch screen.
- Select Setup Menu (If a password is required please contact Paystone support) > Communications > Wi-Fi > Make sure Wi-Fi is set to ON (it will show 2 additional options : Easy Connect and Advanced Setup.
- Select Easy Connect and you will see a list of nearby networks. Select your network.
- Type the Wi-fi network password. You will receive a "Connection to network Successful" message.
Completing a test transaction
- Press 0, “Sale” or touch sale on the screen.
- Enter $0.01, Press Enter.
- Enter 1 if prompted for Invoice# or Server ID.
- Insert or Tap Card.
- Terminal should display “Approved” If not please contact Paystone support.
If needed you can void the above test transaction by following the below steps
- Press 3, “Void”.
- If a password is required please contact Paystone support
- Select All, Find transaction from above.
- Select sale, Insert card to perform void sale.
You are ready to accept payments!
For 4G set-up
To connect via 4G network, a SIM card is required. (The SIM is already inside the terminal if you ordered the 4G model).
Plugging in the Device
- Locate the direct-to-terminal charge cable.

- Locate the power port on the left side of the terminal (marked with the power symbol (
 ) and Insert the direct-to-terminal cable connector into the port.
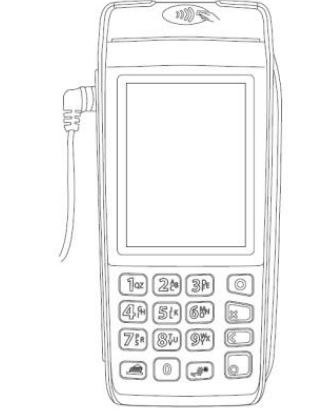
- Plug the other end of the cable into a working power outlet.
- Press the Green key to power ON the terminal, proceed to the next steps below.
Connecting Your Move5000 to 4G
The sim card is pre-installed, you just need to power ON the terminal by pressing the Green Key and complete a test transaction.
Completing a test transaction
- Press 0, “Sale” or touch sale on the screen.
- Enter $0.01, Press Enter.
- Enter 1 if prompted for Invoice# or Server ID.
- Insert or Tap Card.
- Terminal should display “Approved” If not please contact Paystone support.
If needed you can void the above test transaction by following the below steps
- Press 3, “Void”.
- If a password is required please contact Paystone support
- Select All, Find transaction from above.
- Select sale, Insert card to perform void sale.
You are ready to accept payments!
Please call Paystone Support for any assistance at 1-888-900-9192
![]()