VX820 DUET TERMINAL SETUP & CONNECTIVITY GUIDE
Please note this article applies to terminals with Global Payments
Plugging in the Device
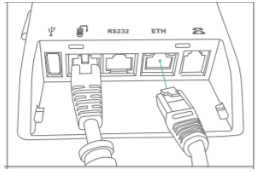
- Connect an ethernet cable to the ETH port located on the base of the terminal.
- If using dial connection connect phone line to the
 symbol on the back of the base.
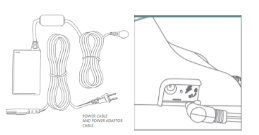
- Connect the power cable to the terminal base(side of base) and the other side to a surge protector or power box.
Connecting your Device
Once the terminal loads to the Payments screen, follow the steps below to set up your IP connection.
|
From the Global Payments Screen, Press the |
|
Press the number 3, The CommServer screen appears |
|
Press the |
|
Select IP. The IP Config menu appears |
|
On the IP Config menu, at the “IP Settings” prompt, select Edit. |
|
Select DHCP or STATIC (Note: Contact your Internet Service Provider (ISP) to determine the addresses for these parameters if choosing static) |
|
Select Exit, then select Yes to save changes. |
|
Press the green OK key to return to the Ethernet Cfg menu, then press the |
Completing a Test Transaction
Performing a Key Request on your device
- Press the menu button
 , (Arrow)
 - Find “Test” in the Menu options
- Select Test
- Select Handshake
- The Terminal should display an “Approved” Message on the screen.
- Press the Cancel button back to the main payments screen
Congratulations! You are ready to accept payments!
Please call Paystone Support for any assistance at 1-888-900-9192
![]()