How to Set Up
Watch the video to learn how to set up your POYNT device.
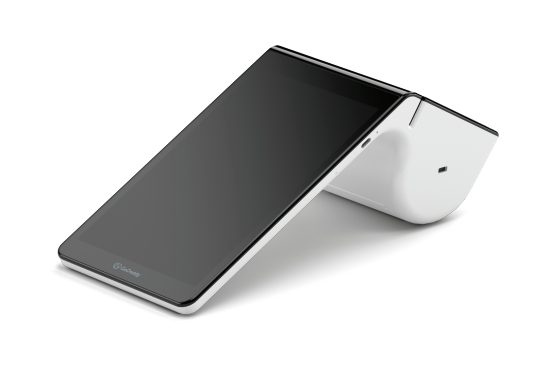
Knowing the Product
Feature/Functionality
- Contactless EMV, Mobile Payments like Apple Pay (NFC), Manually Keyed, Interac
- Connects to WIFI or 4G
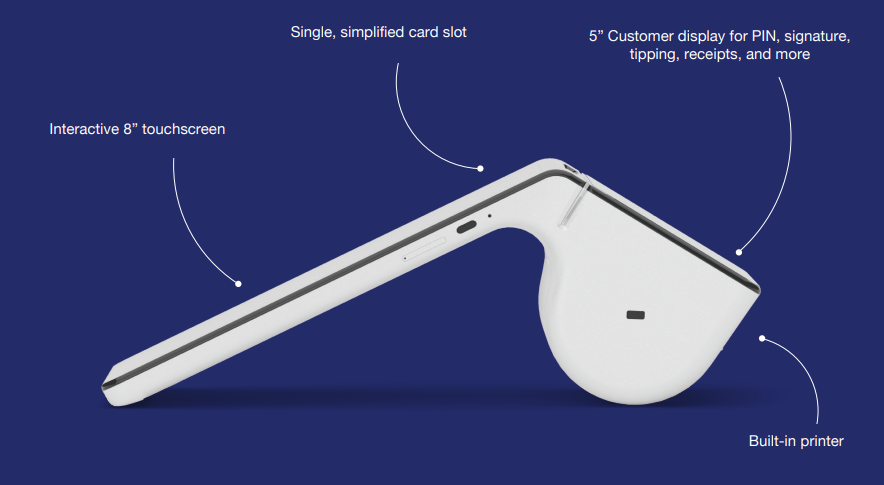
- Customer display for PIN, signature, tipping, receipts, and more
- Interactive 8” touchscreen
- Built-in printer
- USB-C port for data and charging
- Durable, ergonomic form factor
- Rechargeable battery (up to 12 hr)
- Register App for taking orders, organizing products, and adding modifiers/discounts/taxes
- Octa-core processor, 16GB storage, Speaker, Ambient light sensor
Installing the Paper Roll
Paper size: 58mm (width) x 40mm (diameter), 12 meters (50 feet) length
The POYNT C terminal is equipped with a built-in printer. To use the printer, you’ll need to load a roll of paper. Lift the latch on printer compartment, unwrap a roll of paper and insert as shown:
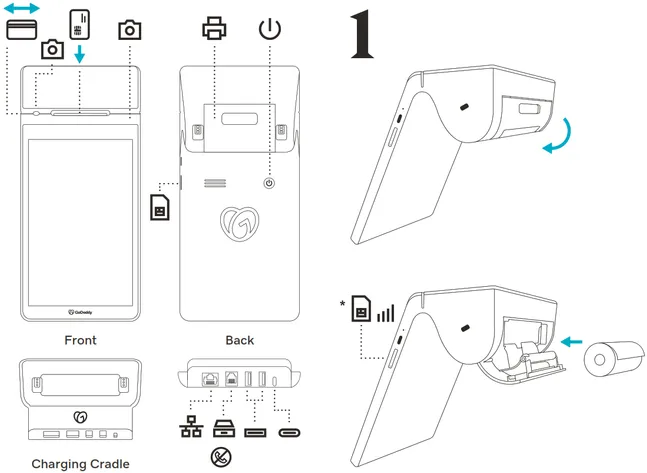
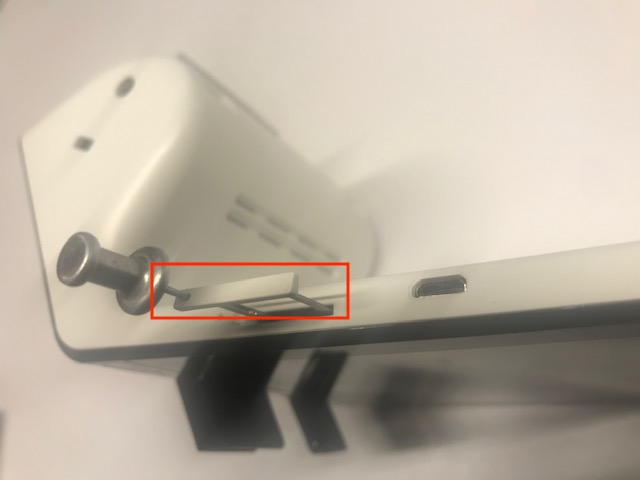
Installing the SIM Card (For Wireless Enabled Terminals)
- Power off the device(Hold the power button for 2 seconds and select power off on the touch screen)
- Use a pin or sharp object to eject the sim card tray from the right side of the terminal
- Place the nano sim card into the sim card tray.
- Insert the sim card tray into the terminal
- Power on the terminal
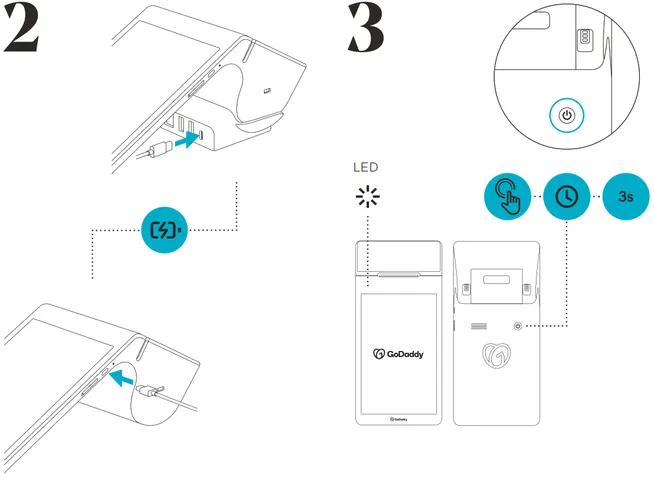
Initial Terminal Setup and Activation
- Device Placement
When connecting with a strong private WiFi or 4G connection, you have the freedom to place your device wherever you’d like to transact. If you are connected via ethernet only the device must stay seated on the docking station

- Power On
To turn on your device, press and hold the power button on the back of the larger merchant screen for 3 seconds.
- Connect
Your device will now walk you through activation and network setup,
After connecting, it may begin to update its software as required. This can take a few minutes. Allow the device to download, install, and reboot before getting started.
To connect to WiFi:
Connection during initial setup
- Select Language - English - Canada
- Press Continue
- Press Skip for Mobile Connection
- Select the desired WIFI Network
- Please note this must be a secured network utilizing WPA or WPA2
- Press Connect
- Create a new user login
- Accept Terms & Conditions
To connect to 4G:
Connection during initial setup
- Select Language - English - Canada
- Press Continue
- If your 4G SIM card was provided to your reseller organization, simply insert it into the device and you'll automatically be connected
- Create a new user login
- Accept Terms & Conditions
Connection Settings after Terminal has been activated
To connect to WiFi:
Connection once device has been activated
- Swipe down from the top of the screen twice
- Long press the Wi-Fi icon
- Select the desired WIFI Network
- Enter Password for the WIFI Network
- Please note this must be a secured network utilizing WPA or WPA2
- Press Connect
To connect to 4G:
Connection once the device has been activated
- Power off the device(Hold the power button for 2 seconds and select power off on the screen)
- Remove the SIM card Tray(sharp tool required eg. a pin,thumb tack etc)
- Insert the nano SIM card into the SIM card tray(contacts facing down)
- Power the device back on by pressing the power button for 3 seconds
- The device will automatically determine the APN and connect to the cellular network