Your new Station Duo
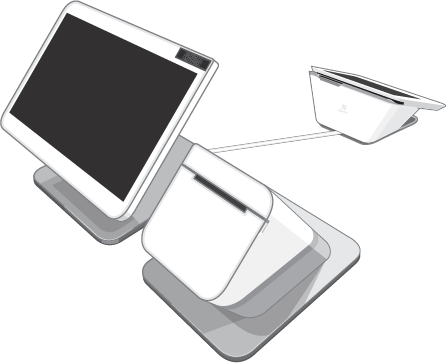
Here’s what your Station Duo does:
- Takes order input on the 14-inch display. Just enter the items for purchase and tap Pay.
- Takes all kinds of payment cards on the 7-inch terminal. Customers can swipe, dip, and tap their cards.
- Takes digital wallet payment options where mobile customers can either tap their phones or scan a QR code.
- Takes cash and checks with the optional cash drawer.
- Promotes your loyalty programs right on the terminal where customers can see them.
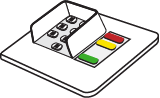
Open the box
What’s in the Station Duo box:
- Clover Station Duo Quick Start Guide
- 14-inch merchant-facing display
- 7-inch customer-facing terminal
- Station Duo receipt printer
- Starter kit with everything you need to set it all up

The display faces you and takes order input.

The terminal faces your customers, accepts payments and signatures, and has a headphone jack and speaker on the reverse side of the screen.
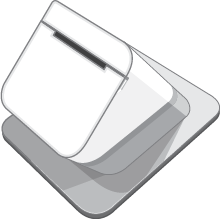
The printer prints a paper receipt on demand.

The screwdriver helps you connect all the cables for easy assembly.
The connector cable connects the terminal to the display.

The hub connects the terminal and the display to the power adapter.
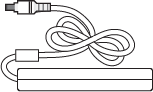
The power adapter connects the assembled system to the power cable.
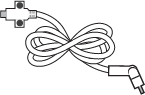
The power cable connects everything to the power source.

The LAN Ethernet cable connects the completed assembly to your internet network.

The receipt paper roll goes into the printer.
The PIN Entry Aid sits on top of the terminal. This option assists customers who have difficulty using a touchscreen. (Shipped with the Station Pro in some regions, and available everywhere. Contact your merchant supplier for details.)

The optional PIN Shield sits on top of the terminal and gives customers added privacy when they enter their PINs. (Shipped with the Station Duo in some regions, and available everywhere. Contact your merchant supplier for details.)
Put together your Station Duo
Put together your Station Duo by connecting all the parts. After all the parts are connected, you can plug it in. Start by getting ready to connect the parts.
Get ready to connect the parts
- Take everything out of the box.
- Gently place the Station Duo Display screen side down on a clean, flat surface. Don’t worry about the screen. It resists scratching.
- Place the Station Duo Printer upside down next to the display.
- Place the Station Duo Terminal, screen side down, next to the printer.
You’ll be looking at the bases of all 3 devices and the printer will be in the middle. Now you can connect the parts.
Connect the parts
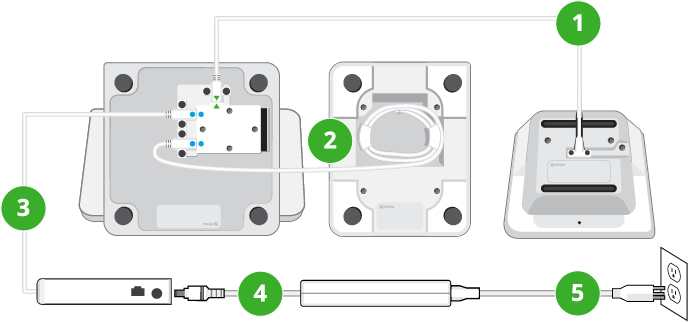
Connect the parts by following the numbered steps here and above:
- Pick up the main connector cable. This cable has two small screws in both ends and one end has a green arrow.
- Use the supplied screwdriver to connect the end of the cable with the green arrow to the base of the display, as shown.
- Plug in and connect the other end to the base of the terminal, as shown.
- Screw in the screws with hand-tight pressure, in other words, just hard enough to secure each screw and also be able to unscrew it later if needed.
- Unwind the printer cable from the printer base and use the screwdriver to connect the printer cable to the base of the display, as shown.
- Pick up the hub and use the screwdriver to connect its cable to the base of the display, as shown.
- Pick up the power adapter, sometimes called a power brick, and plug one end into the hub, as shown.
- Plug the other end of the power adapter into your power source for the system.
Your system is now connected and you can place each device right side up. The (smaller) terminal automatically powers on first, and then the (larger) display. There are no power buttons, but there is a reset button on the reverse side of the customer-facing terminal screen in case you are ever instructed by Customer Support to use it.
Next, connect your Station Duo to a network.
Connect your Station Duo to a network
Connect your Station Duo to the network after you assemble it. There are different ways to connect your Station Duo to a network: Ethernet (recommended) and Wi-Fi.
If you plan to connect to a network using Wi-Fi, check to make sure your router is set up, connected to the network, and has a security level of WPA or WPA2. Your network needs to be a closed, protected, secure network to process payment transactions. If you offer Wi-Fi access to your customers, follow best practices and give them a different Wi-Fi network to use.
- On the Welcome screen, select your preferred language and then tap Next.
- On the Network screen, choose your network type and tap Continue:
- Ethernet networks connect with the supplied Ethernet cable.
- Wi-Fi networks connect wirelessly to a router you have previously set up.
- Wait until you see the message that the device is successfully connected and then tap Next.
Next, activate your Station Duo.
Activate your Station Duo
Activate your Station Duo after you connect it to a network.
To activate your Station Duo, you'll need the activation code from the activation email you received from Clover.
- On the device activation screen, enter the 8-digit code you received in your activation email from Clover Support (app@clover.com). If you’ve already set up your account, you can also find the code on the Web Dashboard at the top of the page after you log in.
- On the Install apps screen, wait while Clover updates the apps that come pre-installed on your system.
- Select the Clover Service Plan you signed up for.
- (Optional) Check the boxes for any third party apps you want to use. (You can also do this later from the Web Dashboard by choosing More Tools.) You’re done with activation.
Next, set up the printer.
Set up the Station Duo printer
Set up the printer after you activate your Station Duo.
- On the Station Duo display, after you select any third party apps, select Continue.
- Open the top of the printer and press the green latch to release the printer head.
- On the display, tap Continue.
- Install the thermal paper with the edge of the roll following the inside top of the compartment and out the slot.
- Close the printer door until it clicks.
- Tap to print a test receipt. You’re done setting up the printer.
Next, customize your device.
Customize your Station Duo device
Customize your device with passcode access, fingerprint access, and signature locations.
- Passcode access requires an input code on the device screen to log in. At a minimum, you’ll want to set up an account owner passcode.
- Fingerprint access sets your Station Duo to log you in by recognizing a fingerprint when tapped on the sensor at the upper edge. Fingerprint access is optional.
- Signature locations tell the system where customers will sign for their purchases, either on the device, or on paper receipts.
- After activation, on the device, enter the four numbers you want to use to create your account owner passcode.
- On the next screen, enter the passcode again to confirm. (To set up passcodes for employees, use the Employees app.)
- Select Continue.
- (Optional) Set up fingerprint login access:
- Gently tap your finger (or thumb) on the fingerprint sensor at the top right of the display screen.
- Keep tapping until the image on the display shows all parts of your fingerprint. The display will give you progress messages.
- When the display tells you your fingerprint has been added, tap Continue.
- Decide where you want to accept customer signatures by choosing an option.
- Tap Continue.
You’re done customizing your device.
Next, authorize billing and get started.
Authorize Station Duo account billing
Authorize billing at the end of the setup process, after you customize your device.
- Review the device fees and monthly totals for your account.
- Select Authorize.
Now you can get started. Next, log in to your new Station Duo.
Log in to your Station Duo
After you set up a passcode or fingerprint access for your account, you can use them to log in. (To set up passcodes and fingerprint access for your employees, use the Employees app.)
- To log in with a passcode, enter the four digit code you chose for your account.
- To log in with fingerprint access, place your finger on the fingerprint sensor until the display shows your apps.